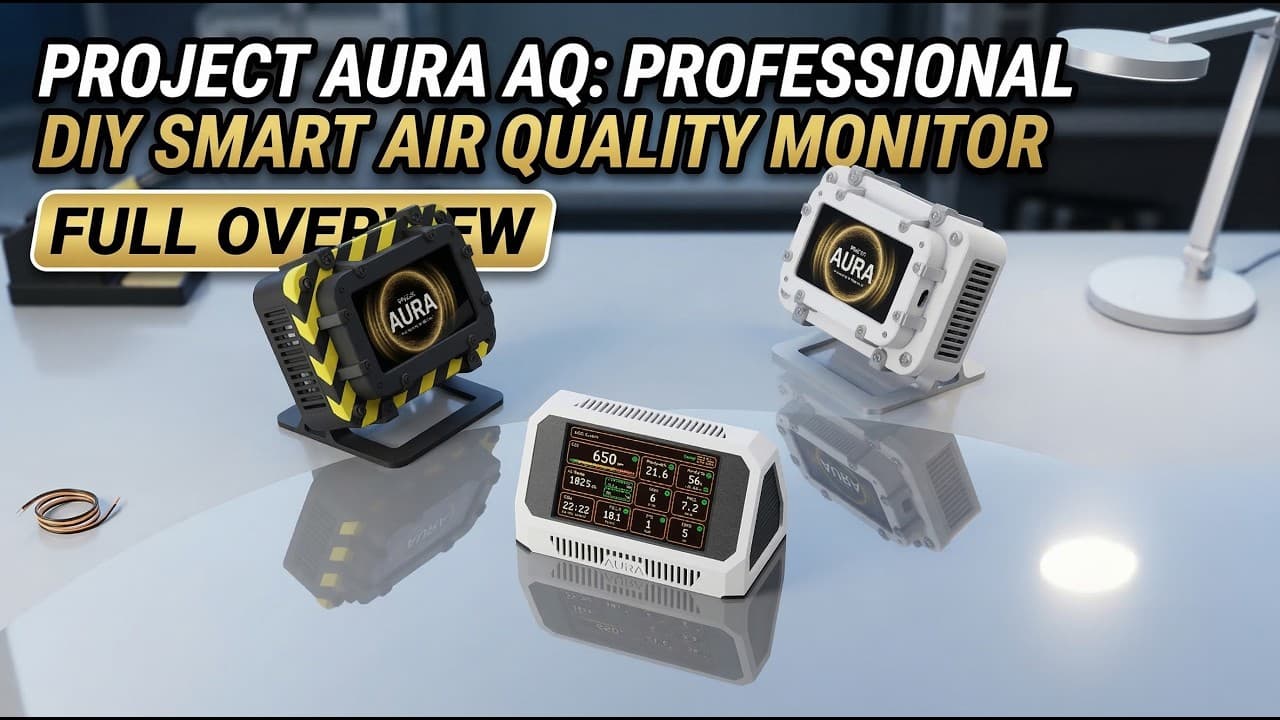
4.3″ compact or 7″ across-room display.
Project available nowLocal-first air-quality station
See what’s really in the air.
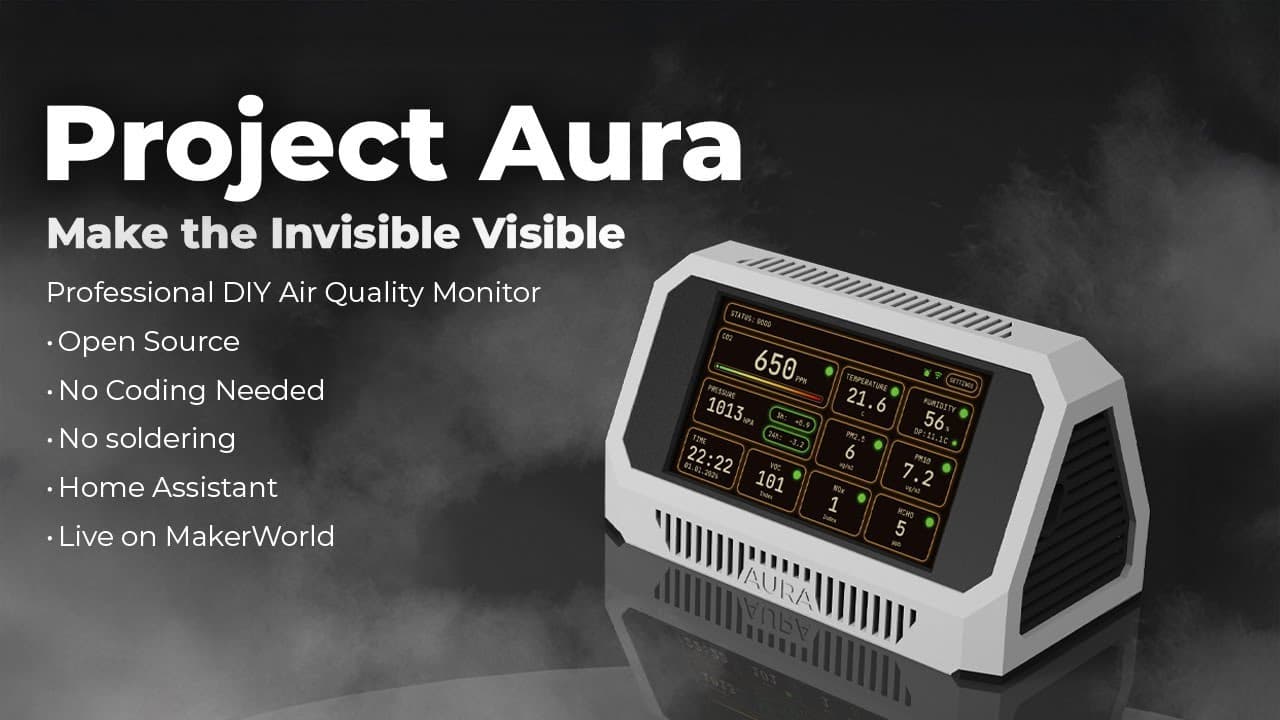
Aura AQ brings particles, CO₂, gas context and room climate together on one local touchscreen — without requiring a cloud account or subscription.
Hero photo neededAura AQ 4.3″ and Aura XL 7″ together, screens on, on a clean dark studio surfaceLandscape crop · both display sizes · interface clearly readableRecommended: 1600 × 1280 px · 5:4
Particles, CO₂, gases and room climate.
Touchscreen and dashboard without a cloud account.
MQTT, Home Assistant and optional Aura AQ Link.
Measurements
Air quality is more than one number.
The standard build covers the room every day. Optional channels add context only where the space needs it.
Standard buildSEN66 + Aura PCB
See fine-particle changes from dust, smoke, cooking and workshop activity.
Understand when occupancy and ventilation are making a room feel stale.
Learn how to understand indoor CO₂Track broad changes from cleaning, materials, cooking and combustion sources.
Keep every air-quality reading in the context of the room around it.
Sensor extensionsPurpose-built for the space
An optional electrochemical channel for garages and combustion-adjacent experiments.
Electrochemical add-onAdd focused monitoring for furniture, adhesives, paints and renovation spaces.
SFA40 sensor add-onAdd one electrochemical module to monitor the gas that matters in your environment. It extends Aura AQ for targeted use in production facilities, farms and livestock areas, laboratories, wastewater treatment, utilities and other specialised spaces.
Available gas modulesNH₃SO₂NO₂H₂SO₃O₂Interface photo neededClose three-quarter view of Aura AQ showing live readings, room status and a visible warning stateScreen in focus · soft room context · no reflections across the displayRecommended: 1600 × 1000 px · 8:5
Device experience
Understand the room at a glance.
Aura AQ is designed to feel like a finished monitor, not a sensor board waiting for another dashboard.
Room status
One readable recommendation at the top of the screen.
Live readings
The current value, unit and condition stay visible together.
Sensor state
Warm-up and availability are shown instead of hiding uncertain data.
Climate context
Temperature, humidity, pressure and trends explain the reading.
Built in public
Open source. Followed by builders.
The firmware is public, development is visible and the complete device can be seen in action before you build.
21cncstudio / project_auraPublic firmware source
700+GitHub stars
60+ forks600+ commitsGPL-3.0 firmware
Inspect the firmware, follow every release and join the project discussion.
Spaces
Build for the air you actually need to understand.
The same core device can stay simple at home or add one focused channel for a specialised room.
Photo neededAura AQ beside a laser cutter in a clean workshopShot reserved for the final Aura AQ photography set.Recommended: 1600 × 1000 px · 8:5
Base build + optional HCHO
Workshop and laser room
See particle and VOC changes around printing, cutting, finishing and ventilation experiments.
Home and bedroom
Watch CO₂, particles, VOC, temperature and humidity without sending the room to the cloud.
Garage and utility room
Add CO telemetry where combustion-adjacent experiments need an extra data channel.
Lab, farm and specialised spaces
Use one specialised gas module when the space has a clearly defined monitoring target.
Local-first
Your air data starts at home.
The screen and local network remain useful on their own. Remote services are an optional extension, not the foundation.
SEN66 and the optional channels you choose
Touchscreen status and local setup
Readings and controls on your own network
Bring Aura into an existing smart home
Photo neededAura AQ local web dashboard open on a laptop beside the deviceShot reserved for the final Aura AQ photography set.Recommended: 1600 × 1000 px · 8:5
Local dashboard
No cloud account required.
Open readings and controls from the same network.
Integration screenshot neededHome Assistant dashboard showing Aura AQ room status, readings and history chartsUse the finished dashboard · dark theme · readable values and chartsRecommended: 1600 × 1000 px · 8:5
Home Assistant
Fits an existing smart home.
MQTT discovery keeps the integration visible and understandable.
Included for every backer
Five enclosure designs are included.
Four compact 4.3-inch variants and one dedicated Aura XL enclosure are supplied with the project files.
Enclosure photo neededClean front three-quarter photograph of 4.3″ · Style 01, screen on, neutral dark backgroundUse the same angle, crop and lighting for the complete enclosure setRecommended: 1200 × 900 px · 4:3
4.3″ · Style 01
Enclosure photo neededClean front three-quarter photograph of 4.3″ · Style 02, screen on, neutral dark backgroundUse the same angle, crop and lighting for the complete enclosure setRecommended: 1200 × 900 px · 4:3
4.3″ · Style 02
Enclosure photo neededClean front three-quarter photograph of 4.3″ · Style 03, screen on, neutral dark backgroundUse the same angle, crop and lighting for the complete enclosure setRecommended: 1200 × 900 px · 4:3
4.3″ · Style 03
Enclosure photo neededClean front three-quarter photograph of 4.3″ · Style 04, screen on, neutral dark backgroundUse the same angle, crop and lighting for the complete enclosure setRecommended: 1200 × 900 px · 4:3
4.3″ · Style 04
Enclosure photo neededClean front three-quarter photograph of 7″ · Aura XL, screen on, neutral dark backgroundUse the same angle, crop and lighting for the complete enclosure setRecommended: 1200 × 900 px · 4:3
7″ · Aura XL
Build path
From parts to a finished monitor in four clear steps.
The project keeps the mechanical build, sensor ports and firmware path separate and understandable.
- 01Choose the display
Start with the compact 4.3-inch build or the larger Aura XL.
- 02Print the enclosure
Use the enclosure files and fastener notes supplied with the project.
- 03Connect the hardware
Mount the Aura PCB, SEN66 and only the optional channels you need.
- 04Install the firmware
Connect by USB and use the protected Aura AQ Web Installer.
Assembly photo neededOpened Aura AQ enclosure with the display, Aura PCB, SEN66 and cable routing clearly visibleTop-down or three-quarter view · clean wiring · every connector easy to identifyRecommended: 1800 × 1200 px · 3:2
Print and prepare the enclosure.
- Choose the enclosure for the selected display.
- Prepare the inserts, fasteners and ventilation path.
- Check fit before installing electronics.
Connect the board and sensors.
- Seat the display and Aura Sensor Hub PCB.
- Connect SEN66 with the separate cable.
- Route optional modules before closing the case.
Interactive BOM
Build Aura AQ without guessing parts.
Required hardware is locked in. Add only the capabilities your room actually needs.
Build configuration
Choose the display once.
The enclosure and exported parts list update with it.
16 MB flash8 MB boards are incompatible
Included in every build
Core kit
Four logical groups cover the complete working monitor.
Photo neededAura AQ 4.3-inch air-quality stationClean isolated component photo on a dark neutral background.Recommended: 1200 × 750 px · 8:5
Required
Aura AQ 4.3″
The compact desktop build and the best starting point for most rooms.
Display + matching enclosure16 MB required
Details
- Model
- Waveshare ESP32-S3-Touch-LCD-4.3
- Connector
- Main display and ESP32-S3 controller
- Cable
- Use the cable included with the display board.
- Note
- The 16 MB flash version is mandatory.
Where to buy
Photo neededProject Aura AQ Sensor Hub PCBClean isolated component photo on a dark neutral background.Recommended: 1200 × 750 px · 8:5
Required
Aura Sensor Hub PCB v1.1
A clean sensor hub with dedicated ports for the full Aura AQ build.
Includes recommended RTC batteryCR1220 3 V lithium coin cell
Details
- Model
- Project Aura AQ Sensor Hub PCB v1.1
- Connector
- SEN66, CO, HCHO/SFA40, DFR gas and DAC ports
- Cable
- No separate cable bundle; optional modules use their included cables.
- Note
- Use this PCB build path instead of the legacy separate hub-board stack.
Photo neededSensirion SEN66 air-quality sensorClean isolated component photo on a dark neutral background.Recommended: 1200 × 750 px · 8:5
Required
Sensirion SEN66
The main particles, CO₂, VOC/NOx, temperature and humidity sensor.
Separate cable requiredJST-GH 1.25 mm pitch, 6-pin, about 100 mm
Details
- Model
- SEN66 all-in-one air-quality sensor
- Connector
- SEN66 port on the Aura PCB
- Cable
- Requires a separate JST-GH 1.25 mm 6-pin cable.
- Note
- VOC and NOx indexes require warm-up; Aura AQ shows the sensor state.
Where to buy
Photo neededAura AQ powered by USB-CClean isolated component photo on a dark neutral background.Recommended: 1200 × 750 px · 8:5
Required
USB power supply
Powers the display board, Aura PCB and connected sensors.
Details
- Model
- Stable 5 V / 2 A USB power adapter
- Connector
- USB-C on the Waveshare board
- Cable
- Use a short, good-quality USB-C power cable.
- Note
- A weak supply can look like firmware or sensor instability.
Configure for the room
Add capabilities
Optional modules are independent from the required core.
Photo neededDFRobot electrochemical carbon monoxide moduleClean isolated component photo on a dark neutral background.Recommended: 1200 × 750 px · 8:5
CO telemetry
Carbon monoxide sensor
Adds CO telemetry for garages and combustion-adjacent experiments.
Details
- Model
- DFRobot SEN0466 electrochemical CO
- Connector
- CO port on the Aura PCB
- Cable
- Included with the DFRobot module.
- Note
- Telemetry only; Aura AQ is not a certified life-safety CO alarm.
Where to buy
Photo neededSFA40 formaldehyde sensor moduleClean isolated component photo on a dark neutral background.Recommended: 1200 × 750 px · 8:5
HCHO readings
Formaldehyde sensor
Adds focused HCHO readings for furniture, adhesives, paints and renovation spaces.
Details
- Model
- DFRobot SEN0661 / Sensirion SFA40
- Connector
- HCHO/SFA40 port on the Aura PCB
- Cable
- Included with the DFRobot SEN0661 module.
- Note
- Use the SFA40-based SEN0661 path for new builds.
Where to buy
Photo neededDFRobot specialised electrochemical gas moduleClean isolated component photo on a dark neutral background.Recommended: 1200 × 750 px · 8:5
One targeted gas
Specialised gas module
Adds one specialised gas channel for a defined lab, farm, storage or production use case.
Details
- Model
- Choose NH3, SO2, NO2, H2S or O3
- Connector
- DFR gas port on the Aura PCB
- Cable
- Included with the selected DFRobot module.
- Note
- Only one specialised gas module can be used at a time; set its I²C address to 0x75.
Photo neededDFRobot GP8403 0–10 V DAC moduleClean isolated component photo on a dark neutral background.Recommended: 1200 × 750 px · 8:5
Ventilation control
0–10 V DAC output
Adds a 0–10 V output for ventilation and control experiments.
Details
- Model
- DFRobot DFR0971 / GP8403 2-channel DAC
- Connector
- DAC port on the Aura PCB; VOUT0 is used
- Cable
- Included with the DFRobot module.
- Note
- This is a control output, not an additional sensor channel.
Where to buy
Web Installer
Install Aura AQ from your browser.
Once the hardware is ready, the official Installer keeps full install, update and recovery on the correct device path.
- 01Connect by USB
Use the supported 16 MB Waveshare ESP32-S3 board.
- 02Choose the install mode
Full install, update and recovery remain clearly separated.
- 03Finish local setup
Complete AP-mode setup, then connect MQTT or Home Assistant if needed.
FAQ
Before you build.
Does Aura AQ require Aura AQ Link?
No. The touchscreen, local setup, local dashboard, MQTT and Home Assistant path work without Link. Link is an optional remote layer.
Do I need an Aura account?
Normal local operation does not require an account. Access to the official protected Web Installer requires an Aura account and the relevant product grant.
Which display should I choose?
Choose the 4.3-inch version for a compact first build. Choose Aura XL when the screen needs to stay readable from farther away and you have a larger print bed.
Can I use an 8 MB Waveshare board?
No. Aura AQ firmware and its filesystem require the correct 16 MB flash board.
What does the standard build measure?
The SEN66 and Aura PCB path covers particles, CO₂, VOC/NOx indexes, temperature, humidity and atmospheric pressure context.
Is Aura AQ a certified CO alarm?
No. The optional CO channel is telemetry for experiments and context; it never replaces a certified life-safety alarm.
Does it work with Home Assistant?
Yes. Aura AQ supports MQTT discovery and can publish its readings to an existing Home Assistant setup.
Make the invisible visible
Ready to build Aura AQ?
Start with the project, prepare the exact parts list, or install firmware on hardware you already have.